Sort shapes into a Venn diagram
Key Notes :
- Shapes and their Characteristics: Start by introducing various shapes (circles, squares, triangles, etc.) and their defining features (e.g., sides, corners, etc.).
- Attributes for Sorting: Explain how shapes can be sorted based on different attributes such as the number of sides, curved sides, straight sides, presence of angles, etc.
- Venn Diagram Introduction: Introduce the Venn diagram as a way to sort shapes based on shared and unique characteristics. It consists of overlapping circles where shared attributes are placed in the overlapping section while unique attributes are in individual circles.
- Grouping Shapes: Show examples of how shapes can be grouped in the Venn diagram. For instance, circles and triangles can be placed in different circles, while the overlapping region can include shapes with curves and shapes with three sides (for example, the intersection of circles and triangles).
- Engagement and Practice: Provide exercises where students can practice sorting shapes into the Venn diagram, either through physical cut-outs or by drawing shapes in the diagram. Encourage them to think critically about the attributes and where the shapes should be placed.
- Encourage Discussion: Foster discussions about why certain shapes belong where they are placed in the diagram. This helps children understand and articulate the reasoning behind their classifications.
- Real-world Examples: Relate the concept to real-world examples, like sorting objects in everyday life based on their attributes, such as sorting fruits or toys.
Learn with an example
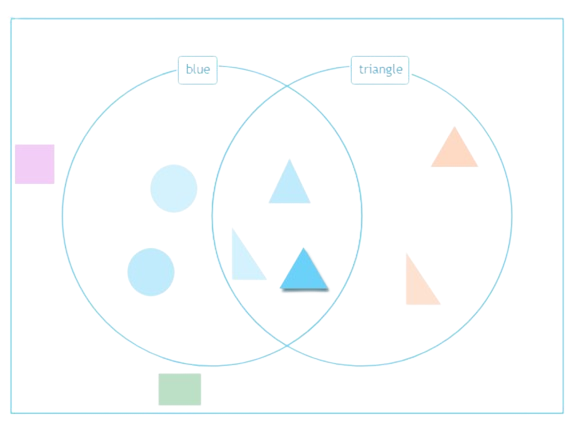
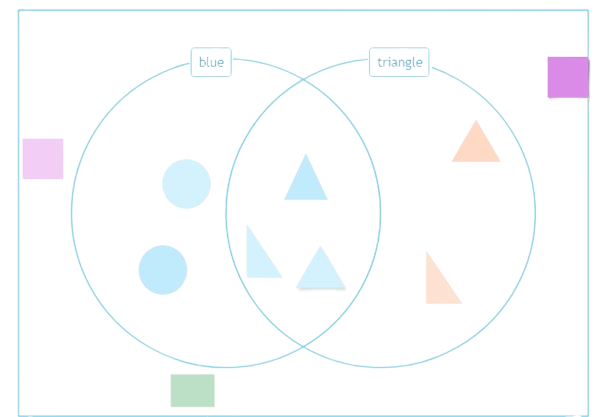
🎈 Put the shapes into the Venn diagram.
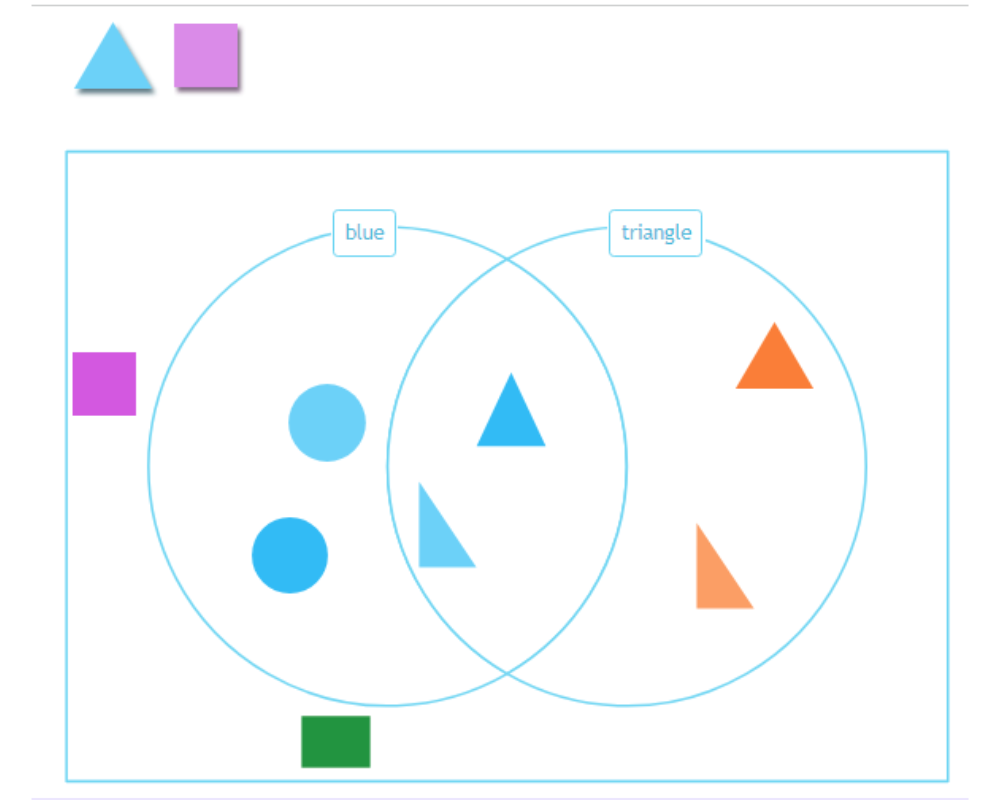
- This is a blue triangle.
- It belongs inside both circles. Place it in the overlap. blue triangle\
- This is not a triangle. It is not blue.
- Place it outside both circles.
🎈 Put the shapes into the Venn diagram.
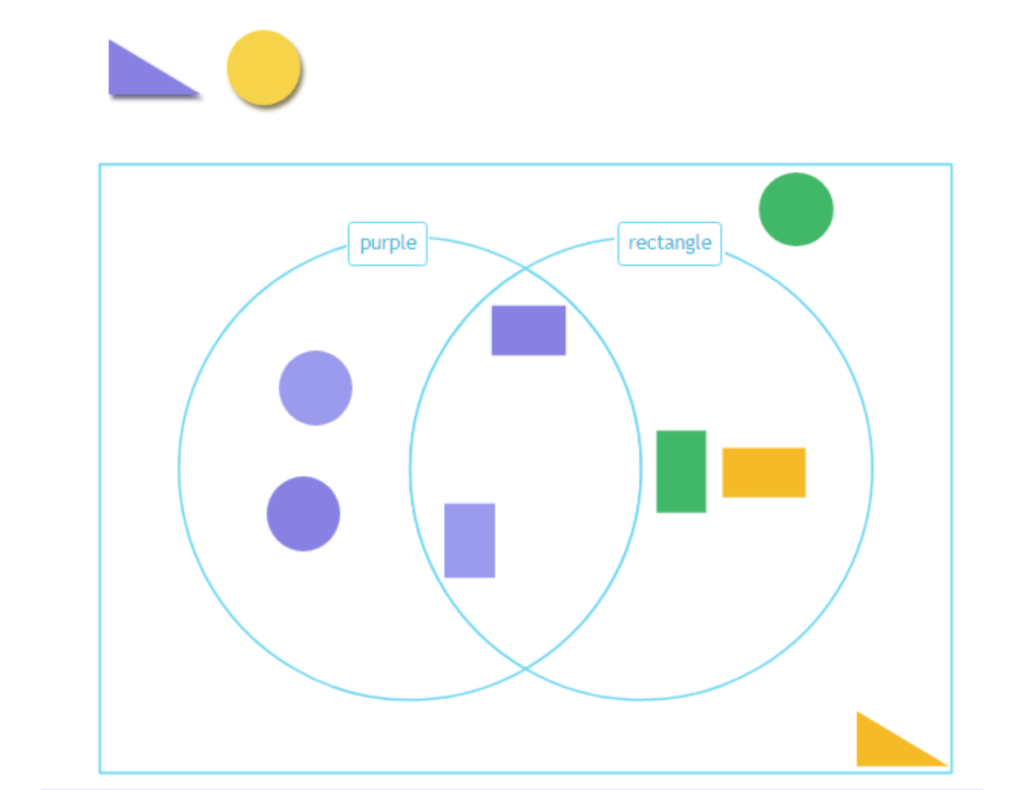
- This shape is purple. It is not a rectangle.
- Place it inside the section marked purple. It does not go in the overlap because it is not a rectangle.
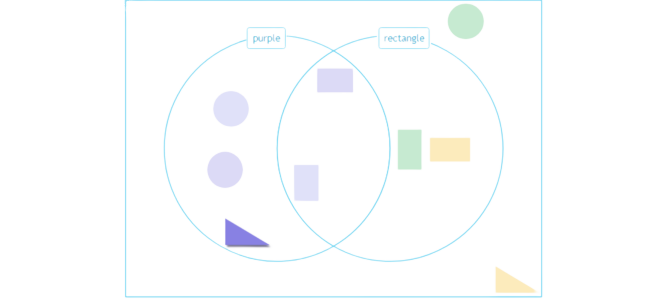
- This is not a rectangle. It is not purple.
- Place it outside both circles.

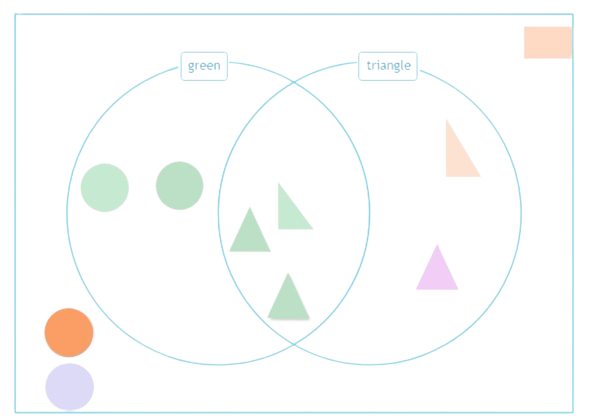
🎈 Put the shapes into the Venn diagram. green triangle
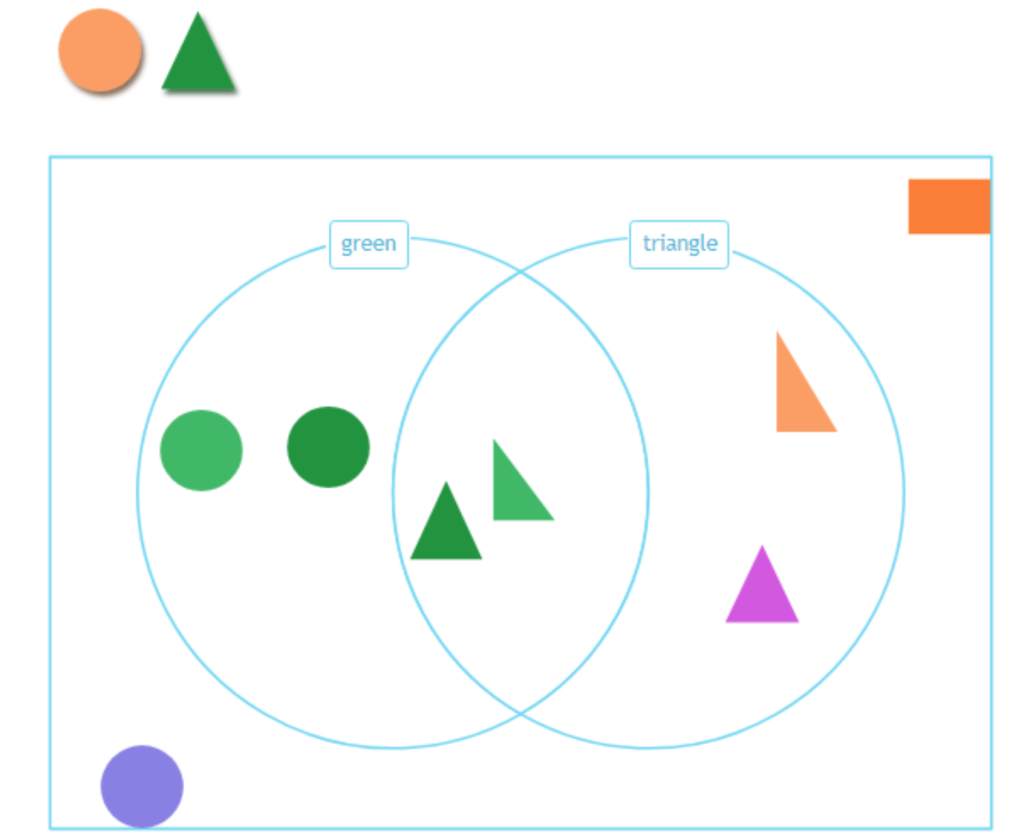
- This is a green triangle.
- It belongs inside both circles. Place it in the overlap.
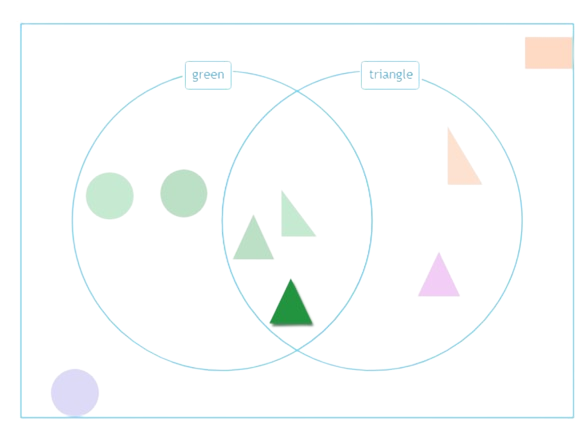
- This is not a triangle. It is not green.
- Place it outside both circles.
Let’s practice!🖊️